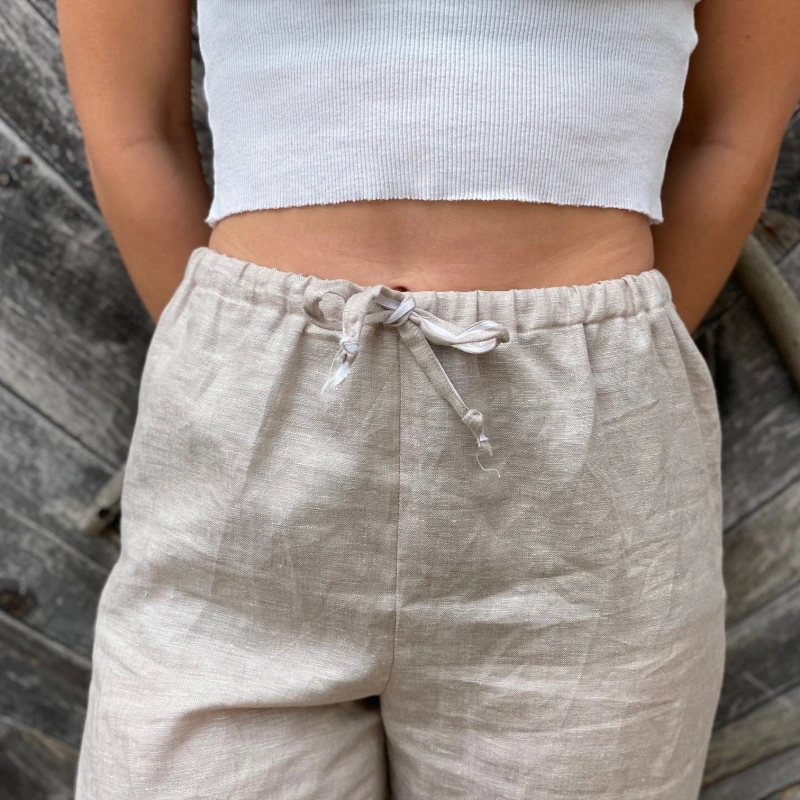
Over time, the elastic waistband in your favorite pajama pants can lose its stretch and elasticity, causing them to feel loose or uncomfortable. When this happens, you don’t need to toss them out just yet! Replacing the elastic is a simple, cost-effective solution that will restore the perfect fit to your sleepwear, keeping you comfy and cozy.
Whether your elastic has become too stretched out or is simply wearing down, replacing it with a fresh, snug piece is a quick fix that can make a world of difference.
Not only will you get a better fit, but you’ll also save money by reviving your favorite pajamas pants instead of buying new ones. This guide will show you step-by-step how to replace the elastic waistband in your pajama pants and make them fit like new again!
What You’ll Need: Essential Supplies
You will need:
- Needles: A universal needle (size 75/11 or 90/14) works best for most pajama fabrics like cotton or blends, but you can use a thicker needle for thicker materials.
- Thread: Choose polyester thread for durability, and pick a color that matches your fabric to keep everything neat and seamless.
- Pins & Scissors: Use pins to hold the fabric in place as you sew, and sharp scissors to cut the elastic and fabric neatly.
- Seam Ripper: You’ll need a seam ripper to carefully open the waistband and remove the old elastic.
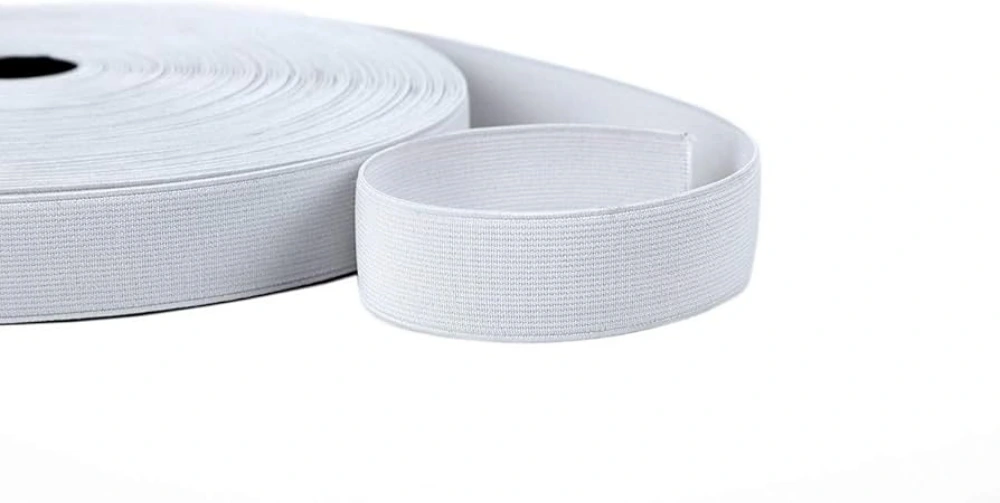
- Elastic Band: Measure your waist to choose the right width and length for the elastic, and make sure it’s stretchy enough to give a snug but comfortable fit.
- Pencil or Safety Pin: A pencil or safety pin will help you easily guide the new elastic through the waistband casing.
- Measuring Tape: For an accurate fit, use a measuring tape to measure your waist where the waistband sits, plus a little extra for seam allowance.
How to Replace Elastic in Pajama Pants: Step-by-Step Guide
Step 1: Measure Your Waist for Elastic Fit
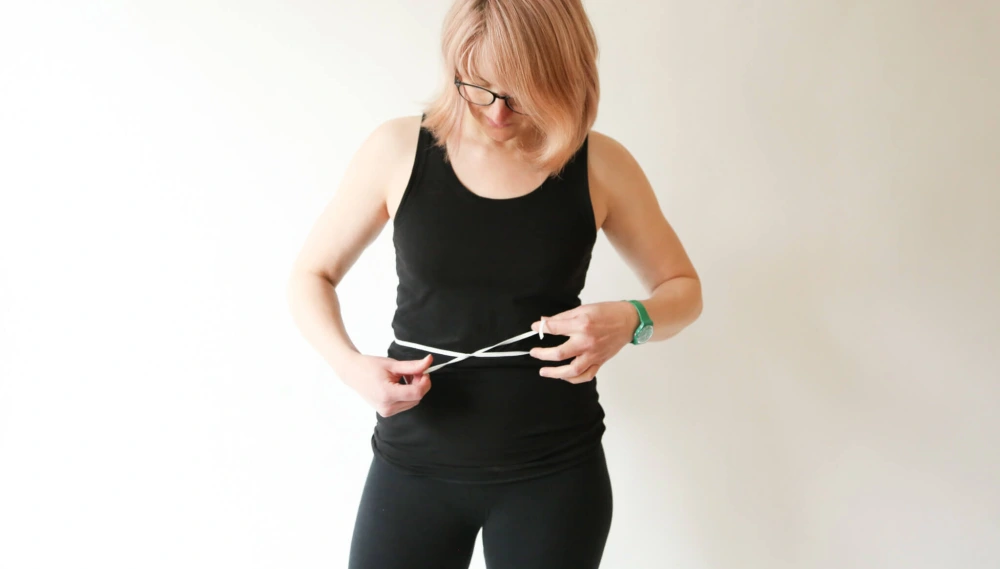
Measure your waist where the waistband of your pajama pants sits, usually about 2 inches above your hip bones. Be sure the measuring tape is flat against your body for an accurate measurement. Add an extra 1-2 inches to your waist measurement to ensure the elastic fits comfortably and gives you room to sew.
Step 2: Remove the Old Elastic and Open the Waistband
Use a seam ripper to carefully open the waistband at the back seam, creating a clean opening to remove the old elastic. Once the waistband is open, take out the worn-out elastic. Check the waistband casing for any damage or wear and make sure it’s ready for the new elastic.
Step 3: Cut Elastic to Fit the Waist Measurement
Cut your new elastic based on your waist measurement, adding an extra 1-2 inches for a secure fit. It’s better to have a little extra length than too little, as it gives you more room to sew the elastic and ensures it has enough stretch for comfort.
Step 4: Inserting Elastic into the Waistband Casing

Attach the end of your elastic to a pencil or safety pin to guide it through the waistband casing. Make sure to pin one end of the elastic to the waistband to prevent it from slipping back inside. Slowly push the pencil (or safety pin) and elastic through the casing, pulling it out through the other side.
Step 5: Sew the Elastic Ends Together
Overlap the ends of the elastic by about 1 inch and sew them together securely. A double stitch or X-stitching works best to keep the elastic in place and ensure it doesn’t come apart. This step is essential to maintaining a secure, long-lasting waistband.
Step 6: Distribute Any Bunched Fabric Evenly
Once the elastic is in place, stretch it gently to make sure it’s even all the way around the waistband. This will prevent any bunching or uneven fabric when you sew it in place. Take your time to ensure the fabric is smooth before stitching.
Step 7: Stabilize the Elastic with Vertical Stitches
To prevent the elastic from shifting inside the waistband casing, sew a few vertical stitches along the waistband to hold the elastic in place. This step is key to keeping the elastic secure and preventing it from rolling or moving around.
Step 8: Close the Waistband Opening
Sew the opening you created in the waistband closed. Use small, neat stitches for a professional finish. If you want a cleaner look, try to make the seam as invisible as possible by stitching it carefully along the edges.
Common Mistakes to Avoid
When replacing the elastic in your pajama pants, a few mistakes can make the process a bit tricky. Here’s what to keep an eye out for:
Elastic Too Tight or Too Loose
If the elastic is too tight, your pajama pants will feel uncomfortable; if it’s too loose, they won’t stay up. Just make sure to measure carefully and add 1-2 inches to your waist measurement so the elastic fits snugly but comfortably.
Elastic Twisting Inside the Waistband
This happens when the elastic isn’t secured properly while you’re threading it through the casing. Pin one end of the elastic to the waistband before you begin and make sure it doesn’t slip back inside as you push it through.
Uneven Distribution of Fabric
If you don’t stretch the elastic evenly while sewing, you’ll end up with bunchy or loose spots on your waistband. Gently stretch the elastic to match the waistband and make sure the fabric is smooth all the way around before you stitch.
Tips for Long-Lasting Elastic Waistbands
Want to make sure your pajama pants’ elastic waistband lasts as long as possible? Here are a couple of easy tips:
Extend the Life of Your Pajama Elastic
Wash your pajama pants in cold water and avoid high heat when drying them. This helps prevent the elastic from losing its stretch. You can also hand-wash or use a gentle cycle to keep the elastic in great shape for longer.
When to Replace Elastic Again
If your waistband starts to feel loose or the elastic just isn’t as stretchy as it used to be, it’s time for a replacement. On average, you might need to replace the elastic every 1-2 years, depending on how often you wear them.
Troubleshooting: Fixing Common Problems
Sometimes, things don’t go as smoothly as planned when replacing the elastic in your pajama pants. If you run into issues, here’s how to fix them:
Elastic Slipping Through the Casing
If your elastic keeps slipping back into the casing while you’re threading it through, pin one end of the elastic to the waistband before you start. This will stop it from disappearing into the casing and make it easier to pull through.
Uneven Elastic Tension
Stretch the elastic gently as you sew it into place. Make sure the fabric is evenly distributed, so the elastic fits snugly and smoothly around the waistband without any lumps or gaps.
Elastic Bands That Don’t Hold Shape
If your elastic starts to sag or loses its stretch over time, it’s a sign that it might need replacing. When inserting new elastic, make sure it’s a good quality stretch material and measure it carefully for the best fit.
Where to Buy the Best Elastic for Pajama Pants?
When shopping for elastic to replace in your pajama pants, look for brands known for comfort and durability. Gütermann and Dritz are top choices for elastic that stretches well and holds up over time.
You can find these brands at most fabric stores or online at retailers like Joann, Amazon, and Etsy. For affordable options, check out local craft shops or online marketplaces that offer high-quality elastic at budget-friendly prices.
Conclusion
Replacing the elastic in your pajama pants is a small effort that can make a huge difference in comfort and fit. You’ll avoid the hassle of sagging waistbands and enjoy a snug, cozy feel all night long. Plus, by maintaining your favorite sleepwear, you extend their lifespan—saving you money in the long run.
So, why not give it a try? A DIY repair like this not only enhances your comfort but also brings a sense of satisfaction. If you’re in need of new pajama pants, check out Friendtex for high-quality options that you can easily tweak yourself!
FAQ
How to Measure Elastic for Pajama Pants?
Measure the Waistband: Grab a soft measuring tape and wrap it around your waist. This will give you the base measurement for the elastic you’ll need.
Choose the Right Elastic: Opt for a comfortable and durable waistband elastic, like knit or woven, to ensure it fits well.
Cut to Size: Cut the elastic about 1-2 inches shorter than your waist measurement for a snug but not tight fit.
Stretch to Fit: As you sew the elastic onto the waistband, stretch it slightly to ensure it fits comfortably without being too tight.
How to Get Blood Out of Pajama Pants?
Act Quickly: Gently blot the blood stain with a clean cloth to absorb as much as you can.
Soak in Cold Water: Submerge the stained area in cold water for 10–15 minutes to loosen the blood.
Apply Soap or Stain Remover: Use a mild soap or stain remover and gently rub it into the stain.
Wash with Cold Water: Launder the pajama pants in cold water, checking if the stain has completely disappeared before drying.
Repeat if Necessary: If the stain is still there, repeat the process until it’s gone.
How to Stretch Out Pajama Pants?
Wet the Fabric: Dampen your pajama pants with warm water to make them more flexible and easier to stretch.
Stretch Gently: Lay the pants flat and gently pull them to the desired size, focusing on the waistband or legs.
Let Them Dry Naturally: Let the pants air dry while continuing to stretch them out occasionally to keep the shape intact.
How to Shrink Pajama Pants?
Soak in Hot Water: Immerse the pajama pants in hot water for a few minutes to start the shrinking process.
Heat in the Dryer: After soaking, toss the pants in the dryer on a high heat setting for about 20–30 minutes.
Check the Fit: Once they’re dry, check if the pants have shrunk to the size you want. If they haven’t, repeat the process.
How to Make Pajama Pants?
Select Your Fabric: Pick a soft fabric like cotton or flannel—perfect for comfy pajama pants.
Take Measurements: Measure your waist, hips, inseam, and desired pant length to create a pattern.
Cut the Fabric: Using your pattern, cut out the pieces for the front, back, and waistband of the pants.
Sew the Pieces Together: Sew the pants together, leaving room for the waistband and any decorative cuffs you’d like.
Add the Waistband: Attach an elastic or drawstring waistband for a perfect fit that you can adjust.
How to Style Pajama Pants?
Pair with a Simple Top: Combine your pajama pants with a fitted T-shirt or tank top to balance out the loose fit.
Add a Jacket or Cardigan: Layer a cardigan or casual jacket for a stylish, put-together look that’s still comfy.
Choose Comfortable Shoes: Slip-on shoes or sneakers will keep you comfy without compromising style.
Accessorize with a Hat or Scarf: Add a casual hat or scarf to make your outfit look effortlessly chic.
Play with Prints: Don’t be afraid to mix and match patterns—floral pajama pants with a neutral top can look fresh and fun.