Yes, you can learn how to sew pockets into pajama pants, even if you’re just starting out. You might feel nervous about adding pockets, but this sewing tutorial breaks it down so anyone can follow along.
Watching a video or reading a step-by-step sewing tutorial makes the process clear and fun. If you want pajama pants with pockets, you’ll find that the right pockets make your pajama pants more useful. Try this sewing tutorial and see how easy it is to add pockets. You might even want to share your results in a video!
Key Takeaways
Choose soft, sturdy fabric like cotton for pockets to ensure comfort and durability.
Always wash and iron your fabric before sewing to prevent shrinking and make cutting easier.
Mark pocket placement carefully and try on pants to ensure pockets feel comfortable and look professional.
Pin pocket pieces with right sides together and sew with neat seams to avoid fraying and keep pockets strong.
Reinforce pocket seams with extra stitching and press seams for a crisp, long-lasting finish.
Materials and Tools
Fabric for Pockets
Choosing the right fabric for your pockets makes a big difference. You want something soft but sturdy. Cotton works well for most pajama pants. It feels comfortable against your skin and holds up after many washes. If you want your pockets to stand out, try using a contrasting fabric.
This makes it easier to see what you are doing as you sew, especially if you are a beginner. You can even use leftover fabric scraps from other projects. Just make sure the fabric is not too thick or stiff, so your pockets do not feel bulky.
Tools Checklist
Before you start, gather your tools. Having everything ready helps you stay organized and makes sewing smoother. Here is a handy checklist:
Sewing machine (or needle and thread for hand sewing)
Sharp fabric scissors
Pins or clips
A Measuring tape or ruler
Tailor’s chalk or washable fabric marker
Iron and ironing board
Seam ripper (for fixing mistakes)
Matching thread
Tip: High-quality needles and pins prevent fabric damage and help you get clean, even stitches. Measuring tools like tape measures and rulers keep your pocket placement precise. Marking tools such as tailor’s chalk or washable markers help you transfer your pocket design onto the fabric with accuracy.
Optional Supplies
Some extra supplies can make your sewing experience even better:
Thimble (protects your fingers)
Threader (helps with threading needles)
Small trimmers or snips (for neat thread ends)
Serger machine (for professional seam finishes)
Embroidery hoop (if you want to add decorative stitching)
Keeping your tools clean and replacing worn-out items helps you get the best results. When you invest in good tools and take care of them, your sewing projects—like adding pockets—turn out better and last longer.
Prepare Pajama Pants
Wash and Iron
Before you start sewing, you want your pajama pants and pocket fabric to look and feel their best. Washing and ironing help you get rid of any dirt, dust, or chemicals from the fabric.
Clean fabric also shrinks before you sew, so your finished pockets will fit just right. Ironing smooths out wrinkles, making it easier to measure and cut straight lines.
Here’s why this step matters:
Advanced cutting methods, like laser or ultrasonic cutting, can reduce microfiber release by up to 20 times compared to regular scissors.
Using the right sewing techniques and edge finishes can cut down on fiber shedding by over 60%.
Covering fabric edges with proper seams can lower microfiber release by as much as 93%.
When you prepare your fabric well before sewing, you make your pajama pants more durable and help them last longer.
Tip: Always wash and iron your fabric before you do anything else. This simple step saves you from surprises later!
Mark Pocket Placement
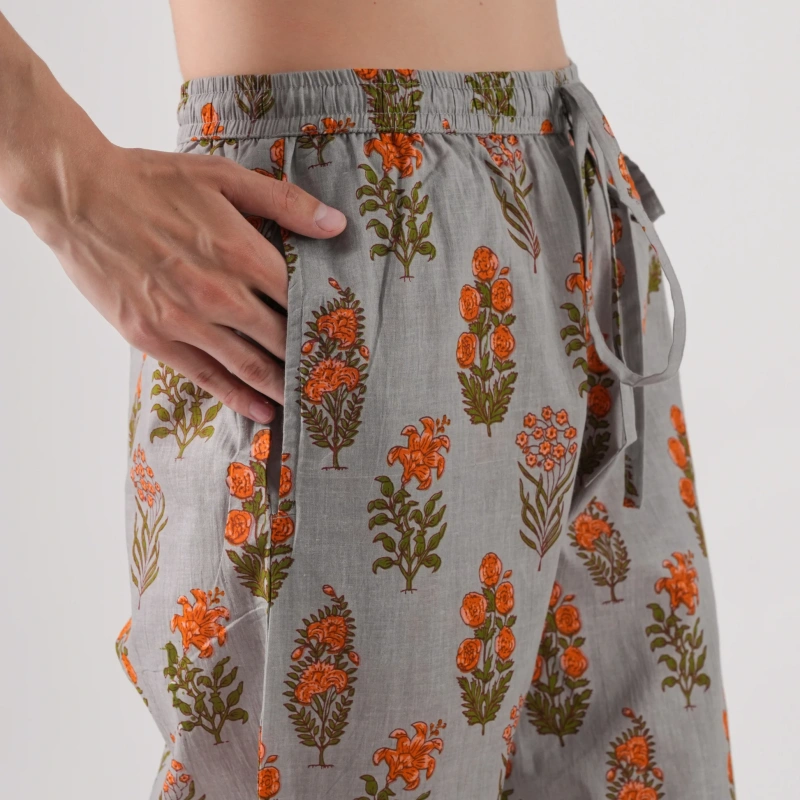
Now, you need to decide where your pockets will go. Lay your pajama pants flat on a table. Use tailor’s chalk or a washable marker to mark the spot for each pocket. Try on the pants and check if the marks feel comfortable for your hands. Adjust the marks if needed.
Accurate pocket placement makes your pockets easy to use and helps your pants look professional. Studies in other fields show that getting placement right improves the final product’s quality, so take your time with this step.
Note: If you want both pockets to match, measure from the waistband and side seam for each mark.
Cut Pocket Pieces
Once you’re happy with your marks, it’s time to cut out the fabric for your pockets. Place your pocket pattern on the fabric and pin it down. Use sharp scissors to follow the outline.
If you use a contrasting fabric, it’s easier to see your stitches later. Make sure you cut two pieces for each pocket—one for the front and one for the back.
Tip: Keep your cuts smooth and steady for neat pocket edges.
How to Sew Pockets into Pajama Pants
Pin and Sew Pocket Pieces

Let’s get started with the most hands-on part of this sewing tutorial. You already have your pocket pieces cut out. Now, you need to pin and sew the pocket pieces before you put a pocket into your pajama pants.
If you’re following a step-by-step video, you’ll see how much easier it is to use a contrasting fabric for the pocket lining. This trick helps you spot your stitches and makes the process less confusing, especially if you’re new to how to sew pockets into pajama pants.
Lay out your pocket pieces flat. Make sure the right sides face each other.
Use ultra-fine pins that match your fabric’s weight. This prevents shifting and keeps your fabric smooth.
Pin around the curved edge of each pocket, leaving the straight edge open. This is where your hand will go in later.
If you want extra control, cut your fabric on a grippy surface or use a rotary cutter for clean edges.
Practice pinning and sewing on scrap fabric first. This builds your confidence and helps you avoid mistakes on your real project.
Now, sew the pocket pieces together along the curved edge. Use a 3/8″ seam allowance. If you don’t have a serger, finish the raw edges with a zig-zag stitch. This keeps your pockets from fraying after you sew pajama pants and wash them.
Tip: Press the seam toward the pocket after sewing. Then, sew 1/8″ from the seam on the pocket side. This step makes your pockets look crisp and helps them lay flat inside your pajama pants.
Put a Pocket in Pajama Pants

You’re ready to put a pocket into your pajama pants. This step is where your sewing tutorial really comes to life. You can use fabric from an old pajama top or any soft cotton that matches your pants.
If you want to make sure your pockets are the right size, trace an existing pocket from sweatpants or another pair of pants. The pocket should be about as long as your hand.
Here’s a simple way to insert inseam pockets:
Turn your pajama pants inside out.
Mark the spot where you want the pocket opening. Use tailor’s chalk or a washable marker.
Carefully cut a small opening along the side seam at your marks. Keep the cut just big enough for your pocket.
Pin the pocket inside the pants, matching the seams. Make sure the rough edges face out, so they don’t rub against your skin.
Sew the pocket to the pants around the pinned edges. Reinforce the top and bottom of the pocket opening with a few extra stitches. This keeps your pockets strong, even after you wash and wear your pajama pants.
If you’re making patch pockets, just pin the pocket piece to the outside of your pajama pants where you want it. Sew around the sides and bottom, leaving the top open.
Try on your pajama pants before you finish sewing. Slide your hands into the pockets. Check if the placement feels comfortable. Adjust the position if needed. This step helps you avoid pockets that are too high, too low, or too far back.
Attach and Sew Pockets
Now, you’ll attach and sew the pockets to finish your project. This part of the sewing tutorial brings everything together. Follow these steps for a neat, professional look:
Lay the front and back pieces of your pajama pants right sides together.
Pin along the crotch seam and sew.
Lay out the back pieces, pin the seam, and sew.
Place the front pieces on top of the back pieces, right sides together. Align the sides and pin.
Starting at the top of the pockets, sew all the way around the pocket and down the outside hem. Leave the pocket opening unsewn.
Align the side pant seams and sew 1/4″ from the pocket seam between your marked points.
Pin and sew the inseam from one hem up to the crotch and down the other leg.
Fold the pockets toward the front. Baste the top of the pockets to the front of the pants.
Turn your pajama pants right side out. Press all seams well for a crisp finish.
Note: Reinforce the pocket openings with bartacks. Use a short, close zig-zag stitch. Practice on scrap fabric first. This makes your pockets extra durable.
If you want to see these steps in action, watch a step-by-step video or a video tutorial. Many sewing tutorial videos show exactly how to sew pockets into pajama pants and how to sew pajama pants from start to finish.
You can use these same steps for both inseam and patch pockets. The main difference is where you attach the pocket pieces. For inseam pockets, you hide them in the side seam. For patch pockets, you sew them right onto the outside of your pajama pants.
If you want to sew pajama pants for friends, family, or even your own brand, you might need more help. Friendtex is a professional garment manufacturer that can help you with custom pajama pants or bulk production.
They offer expert sewing, fast sample production, and high-quality results. You can focus on your designs while they handle the details.
Remember: Every time you sew pajama pants or add pockets, you get better. Don’t worry if your first try isn’t perfect. Practice makes progress!
Finish and Reinforce
Reinforce Seams
You want your new pockets to last through many washes and wears. Reinforcing the seams is the best way to make sure your hard work holds up. After you sew the pockets, go back and add a second row of stitches along the pocket opening.
This extra stitching helps prevent the seam from coming apart. You can also use a zig-zag stitch or a short, tight stitch at the top and bottom of the pocket opening. These spots get the most stress when you use your pockets.
Tip: Press each seam with an iron after sewing. This step sets the stitches and makes your pockets look crisp and professional.
Studies show that seam quality and stitching methods play a big role in how strong your pockets will be. Good finishing and reinforcement help avoid problems like fraying, puckering, or seams coming undone. When you take time to reinforce, you boost the durability and strength of your pajama pants.
Check Pocket Function
Before you finish the waistband or hem, check that your pockets work well. Slip your hands inside and move around. Make sure the pockets feel comfortable and sit flat against your body. If you notice any pulling or bunching, adjust the seams now. It’s much easier to fix problems before you close up the pants.
Note: Try on your pajama pants and walk around the room. If the pockets gape or feel too tight, you can still make changes.
Once you’re happy with the fit, you can move on to hemming the legs and adding the elastic waistband. These finishing touches complete your sewing tutorial and give your pajama pants a polished look.
Troubleshooting
Even with a clear sewing tutorial, you might run into a few bumps along the way. Here are some common issues beginners face and how to fix them:
Uneven seams or puckering? Check your fabric feeding and slow down your stitching.
Skipped stitches? Change your needle and rethread your machine.
Thread bunching under the fabric? Make sure the bobbin is in place and the machine is threaded correctly.
Seams coming apart? Reinforce with a second row of stitches or use a zig-zag stitch.
Fabric not feeding? Clean the feed dogs and check for lint.
Pattern pieces not lining up? Double-check your markings and pin carefully.
Remember: Mistakes happen to everyone. Use a seam ripper to fix errors and keep practicing. Each project helps you learn and improve.
If you ever feel stuck, reach out to sewing forums or watch another sewing tutorial for extra help. With patience and practice, you’ll master pocket sewing and enjoy the results every time you wear your pajama pants.
How to Sew Pajama Pants & Fleece Options
How to Sew Pajama Pants?
If you want to sew pajama pants from scratch, you can do it even if you are new to sewing. You just need a free sewing pattern, some fabric, and a few basic tools. Here’s a simple way to get started:
Take your body measurements. Use a measuring tape and check the pattern’s chart to pick the right size.
Download and print your pajama pants pattern. Open it in Adobe Acrobat and print at 100% scale so the sizing stays correct.
Cut out the pattern pieces. Line up the circles and lines, then tape or glue them together.
Lay your fabric flat. Pin the pattern pieces to the fabric and cut them out.
Pin the front and back pieces together, right sides facing each other. Sew along the side seams.
If you want pockets, you can baste them in place now or add them later after you sew pajama pants.
Fold the waistband down, pin it, and sew, leaving a small opening.
Thread elastic through the waistband with a safety pin. Overlap and sew the ends, then close the opening.
Hem the legs by folding up the fabric, pinning, and sewing along the edge.
Tip: Press your seams with an iron as you go. This makes your pajama pants look neat and helps the stitches set.
You can sew pajama pants for yourself, friends, or family. The steps stay the same whether you use cotton, flannel, or fleece.
How to Make Fleece Pajama Pants
Fleece pajama pants feel soft and warm, perfect for chilly nights. When you want to know how to make fleece pajama pants, you follow most of the same steps as above, but you need to handle fleece a little differently.
Use a zig zag stitch. Fleece stretches, so this stitch keeps your seams from breaking.
Choose thicker fleece like teddy, plush, or sherpa for extra warmth and durability.
Always check the nap direction before cutting. This keeps the fabric looking smooth.
Use electric shears if you have them. They make cutting thick fleece easier.
Add knit or non-roll elastic for the waistband. This keeps your pants comfy and in shape.
Hem the legs with a 1-inch fold. This helps your fleece pajama pants last longer.
Note: You can add pockets during the construction or after you sew pajama pants. Both ways work, so pick what feels easiest for you.
Sewing fleece pajama pants is a fun project. You get cozy pants and learn new skills at the same time!
Conclusion
Great job! You just learned how to sew pockets into pajama pants. Keep practicing and try out different pocket shapes or fabrics. You might discover a style you love.
Tip: Wash your pajama pants inside out and avoid overloading the washer. This helps your pockets last longer.
If you want custom or bulk pajama pants, Friendtex can help you bring your ideas to life. Happy sewing! 🧵✨
FAQ
How do I keep my pocket edges from fraying?
You can use a zig-zag stitch or a serger on the raw edges. This helps stop fraying. If you do not have a serger, pinking shears work too. Always finish the edges before sewing the pockets into your pants.
Can I add pockets to pajama pants I already own?
Yes! You can open the side seams with a seam ripper and sew in new pockets. Just follow the same steps as you would for new pants. Try on the pants to check placement before sewing everything back together.
What fabric works best for pajama pockets?
Cotton is a great choice. It feels soft and holds up well. You can also use flannel or lightweight fleece for extra warmth. Try to match the weight of your pocket fabric to your pajama pants for the best results.
Do I need a sewing machine to add pockets?
No, you can sew pockets by hand. Use a strong backstitch for seams. It takes more time, but you still get sturdy pockets. A sewing machine makes the job faster and easier, but hand sewing works in a pinch.
How do I make sure both pockets are even?
Tip: Measure from the waistband and side seam for each pocket. Mark both sides with tailor’s chalk or a washable marker. Double-check your marks before you cut or sew. This helps your pockets line up and look professional.