Ready to try on a beautiful traditional Japanese garment, but not sure where to start? You’re in the right place! This step-by-step guide will show you how to tie a kimono robe with ease, even if you’ve never worn a kimono before.
Friendtex Kimono Robes for Women stand out for comfort and quality, making your first experience extra special.
Premium cotton feels soft and gentle, perfect for sensitive skin.
Inclusive sizing and customization help you find your ideal fit.
Durable stitching keeps your kimono looking fresh after many wears.
You don’t need any experience—just follow along and enjoy how to tie a kimono robe for a comfortable, stylish fit.
Key Takeaways
Choose a comfortable Friendtex kimono robe that fits well and suits your style for the best experience.
Always wrap the left side of the kimono over the right to respect tradition and achieve the correct look.
Use the koshi-himo sash to secure the kimono at your waist and tie the obi sash for style and extra hold.
Adjust the collar and hem carefully to create a neat, elegant appearance and ensure comfort.
Practice tying your kimono slowly, avoid common mistakes, and use a mirror or video to improve your skills.
How to Wear a Kimono Robe?

Learning how to wear a kimono can feel a bit mysterious at first, but you’ll find it’s simple and enjoyable. Starting with the right robe and a little preparation makes all the difference. Friendtex Kimono Robes for Women are a great example of premium quality and fit, so you can focus on comfort and style from the very beginning.
Preparation Steps
Before you start, make sure you have everything you need. Here’s a quick checklist to help you get ready:
Find a comfortable, clean space with a full-length mirror.
Lay out your kimono robe, sash or obi, and a koshi-himo (a thin waist tie).
If you want to follow tradition, you can also prepare tabi socks and a simple undergarment, but most modern robes like Friendtex make things easy.
Allow yourself about 10-15 minutes for your first try. Take your time and enjoy the process.
Tip: Modern kimono robes are designed for quick and easy dressing. You don’t need to worry about complicated layers or rituals. Just focus on how to wear a kimono in a way that feels good for you.
If you want to know how to wear a kimono the traditional way, the process can get pretty detailed. It involves several layers, careful collar placement, and special accessories. Luckily, Friendtex robes skip the fuss and let you enjoy the look and feel of a kimono without all the extra steps.
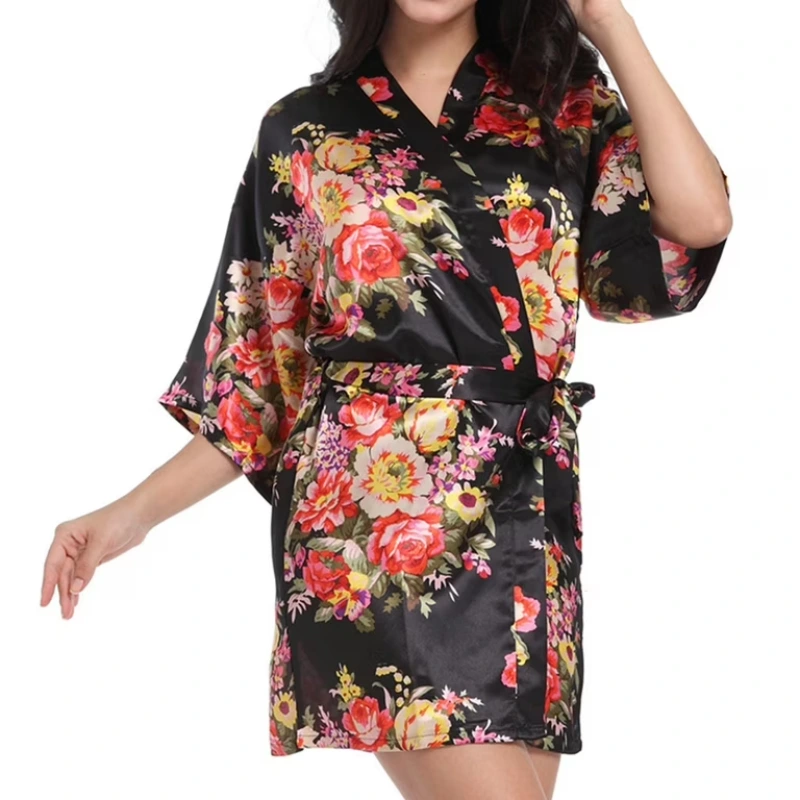
Choosing Your Friendtex Kimono Robe
Picking the right robe is the first step in how to wear a kimono with confidence. Friendtex offers a wide range of kimono robes for women, so you can find one that matches your style and needs. Here’s a quick look at the materials you might find:
Material | Comfort Characteristics | Durability and Care | Extra Notes |
|---|---|---|---|
Cotton | Soft, breathable, comfy | Durable, easy to wash | Great for everyday wear |
Silk | Smooth, hypoallergenic, cool | Needs gentle care | Feels luxurious, perfect for gifts |
Polyester | Lightweight, easy to maintain | Very durable | Stays looking new longer |
Friendtex kimono robes blend traditional design with modern comfort. You can choose from different lengths, colors, and even custom embroidery. No matter which one you pick, you’ll discover how to wear a kimono robe that feels just right for you.
When you’re ready, gather your robe, sash, and koshi-himo. Stand in front of your mirror and get excited—you’re about to learn how to wear a kimono robe like a pro!
Step by Step: How to Tie a Kimono Robe
Learning how to tie a kimono robe can feel like a special ritual. You don’t need to rush. Take your time and enjoy each part of the process. This step-by-step guide uses Friendtex Kimono Robes for Women as the example, so you get both comfort and style as you learn.
Put On the Robe
Slipping your arms through the sleeves of your kimono. Let the robe drape over your shoulders and fall naturally. Make sure the back seam lines up with your spine. If you want a visual, you can watch a video for extra help—many people find a video makes the process even easier.
Stand in front of your mirror. Hold the robe closed with both hands. The fabric should feel soft and comfortable against your skin. Friendtex robes use premium materials, so you’ll notice the difference right away.
Tip: If you’re new to how to tie a kimono robe, don’t worry about getting it perfect on your first try. Practice makes it easier each time.
Adjust the Collar and Hem
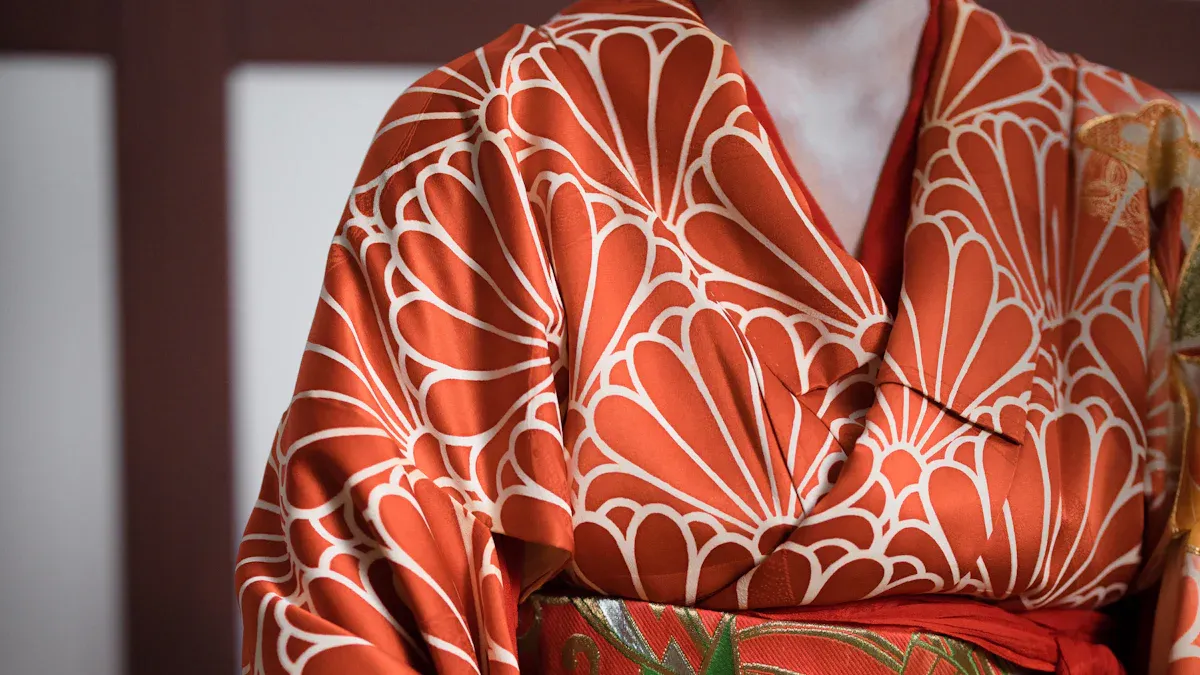
Let’s adjust the kimono so it fits just right. Hold the collar with both hands and gently pull down so the back of the collar sits a little lower on your neck. This creates a traditional look and shows off the nape of your neck, which is considered elegant in Japanese culture.
Next, check the hem. The bottom of your kimono should brush your ankles. If it’s too long, lift the robe slightly at the waist and fold the extra fabric over. This fold is called the ohashori. Use your koshi-himo (the thin sash) to tie around your waist and hold the fold in place. Smooth out any wrinkles as you go.
Note: A good video tutorial can show you exactly how to adjust the kimono for a neat, traditional appearance.
Wrap Left Over Right
This is the most important step in how to tie a kimono robe. Always fold the left side over the right side. Never fold the right side over the left—this style is only for funerals in Japanese tradition. Wrapping left over right shows respect for the culture and keeps your look authentic.
To do this, take the right panel of your kimono and hold it snugly against your body. Then, fold the left side over the right, making sure the edges line up smoothly. This step-by-step action creates the classic kimono silhouette.
The tradition of wrapping the kimono’s left side over the right goes back centuries. It started with the Yoro clothing code in 718 CE, which set this rule for the living. The opposite way, right-over-left, is reserved for the deceased.
So, when you fold the left side over the right, you honor a deep cultural meaning and keep your style correct.
If you ever feel unsure, pause and check a video. Seeing the wrap in action can help you remember which side goes on top.
When you follow these steps, you’ll notice the difference in fit. Traditional tying gives you a neat, elegant look, while modern methods with Friendtex robes offer a relaxed, comfortable fit that works for lounging or special occasions. Both styles look beautiful, but the left-over-right wrap is always key.
Common Mistakes to Avoid
Here are some mistakes beginners often make when learning how to tie a kimono robe:
Wrapping the right side over the left (remember, always left over right!)
Letting the undergarment show at the collar
Forgetting to adjust the kimono so the hem just brushes the ankles
Not checking that the seams and panels are straight and symmetrical
Tying the sash or obi too loosely or in the wrong spot
Standing with poor posture can spoil the look
If you want to see these steps in action, search for a video tutorial. Watching someone else put on a kimono can make everything clearer.
By following this step-by-step guide, you’ll master how to tie a kimono robe and enjoy the comfort and elegance of your Friendtex kimono. Take your time, practice, and soon you’ll feel confident every time you put on a kimono.
Tie the Koshi-Himo and Obi
When you wear a kimono, you want it to look neat and stay in place all day. That’s where the koshi-himo and obi come in. The koshi-himo is a thin sash that holds your kimono together at the waist.
The obi, or sash, adds style and keeps everything secure. Friendtex kimono robes for women include high-quality sashes, so you get both comfort and a polished look.
Secure with Koshi-Himo
The koshi-himo is your secret weapon for a perfect fit. This thin cotton belt wraps around your waist and keeps your kimono from slipping or shifting. It holds the layers in place and helps you create that classic, smooth silhouette.
Here’s how you tie the koshi-himo:
Hold your kimono closed with the left side over the right.
Take the koshi-himo and wrap it snugly around your waist, just above your hips.
Tie the koshi-himo in a firm knot at the center of your back.
Smooth out the fabric above and below the sash so your kimono sits flat.
Tip: If you want your kimono to stay put all day, make sure the koshi-himo feels secure but not too tight. You should be able to move and breathe comfortably.
Tie the Obi or Sash
Now it’s time to add the finishing touch. The obi, or sash, not only keeps your kimono secure but also adds a pop of style. Friendtex robes come with sashes that are easy to tie and feel soft against your skin.
Follow these steps to tie the first obi:
Place the sash over the koshi-himo, centering it at your waist.
Wrap the sash around your waist, bringing both ends to the back.
Tie the first obi in a tight knot at the center of your back.
Next, tie the second obi for extra hold and style:
Take the second sash and layer it over the first.
Wrap it around your waist again, making sure it sits evenly.
Tie the second obi in another knot at the back, right over the first knot.
You can adjust the obi layers so they look even and neat. Some kimono styles use different types of obi, like the maru obi for formal occasions or the hanhaba obi for casual looks. Each type has its way of tying, but the steps above work well for most Friendtex kimono robes.
Remember: After you tie the koshi-himo and both obi, check your comfort. Move your arms and take a deep breath. If anything feels loose, retie for a secure fit.
Final Adjustments and Tips
Check Fit and Comfort
You’ve tied your kimono robe, but a few final tweaks can make all the difference. Here are some expert tips to help you look and feel your best:
Start with the right undergarments. Wearing a simple slip or a light under-robe keeps your kimono smooth and comfortable.
Adjust the collar so it sits evenly, leaving a small gap at the back of your neck. This gives a polished, traditional look.
Use the koshi-himo to keep your kimono snug around your waist. Fold any extra fabric neatly above the sash for a tidy finish.
Smooth out any wrinkles by gently pulling the fabric toward the side seams.
If you want extra hold, add a wide sash over the koshi-himo. This helps hide creases and shapes your kimono for a classic silhouette.
Put on tabi socks before dressing for extra comfort and a touch of tradition.
Tip: Take a moment to move around. Lift your arms, sit down, and check that your kimono stays in place and feels good. Comfort is just as important as style!
Common Mistakes to Avoid
Even with the best kimono, small mistakes can happen. Here are some common ones and how you can fix them:
The collar sits too high or looks uneven. Try pulling the under-robe collar lower at the back and adjust until both sides match.
Wrinkles or bulges appear at the waist. Smooth the fabric and experiment with padding if needed to create a smooth shape.
The ohashori (waist fold) looks bulky. Refold it carefully and make sure the sash holds it flat.
The sash feels loose. Retie it firmly, but not so tight that it’s uncomfortable.
The left side isn’t wrapped over the right. Always double-check this step before finishing.
Note: Don’t worry if it takes a few tries to get your kimono just right. Practice helps, and soon you’ll find your favorite way to style it.
Want to add a personal touch? Try accessorizing your Friendtex kimono robe with a decorative obi, a pretty brooch, or a silk hair tie. You can even choose custom embroidery or a unique color to make your kimono truly yours. These little extras help you stand out and enjoy your robe even more.
Conclusion
You’ll get better at tying your kimono robe each time you practice. Don’t worry if it feels tricky at first—patience pays off! Here are a few tips to help you along the way:
Position your robe evenly on your shoulders.
Cross the sides left over right for a neat look.
Tie the sash snugly, but keep it comfortable.
Adjust for fit and mobility.
Use a mirror and take your time.
Friendtex Kimono Robes for Women make every step feel easy and stylish. Keep practicing, and soon you’ll wear your kimono with confidence and grace!
FAQ
How do I wash my Friendtex kimono robe?
You can machine wash your robe in cold or lukewarm water. Use a gentle cycle. Avoid bleach. Air dry or tumble dry on low heat. This keeps your robe soft and looking new.
Can I wear my kimono robe outside?
Yes! You can wear your Friendtex kimono robe for casual outings, at home, or even as a stylish cover-up. Just pick a style and color that fits the occasion.
What size should I choose?
Check your bust, waist, and hip measurements. Friendtex offers petite, standard, and sizes. If you’re unsure, use their size chart or reach out for help. You’ll find a comfortable fit.
Can I customize my kimono robe?
Absolutely! You can add embroidery, pick your favorite color, or even request a special design. Friendtex lets you create a robe that feels unique and personal.
Is the fabric safe for sensitive skin?
Yes, Friendtex uses hypoallergenic materials like cotton, silk, and satin. These fabrics feel gentle and soft, so you can wear your robe comfortably, even if you have sensitive skin.